Sailplane Canopy Seal

Sailplane Canopy Seal
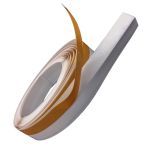
Editors Note: V–Seal is generally used on the inside of the vertical stabilizer to seal the rudder. This works well and is easy to install on both the right and left inside of the vertical stabilizer once the rudder is removed. With some trimming and great care, you can use V-Seal on the front and aft part of your canopy making your cockpit significantly quieter.
A Noisy Cockpit
A noisy cockpit isn't something to ignore. You may find it hard to concentrate during a flight. How are your fatigue levels? Is your glider just not keeping up with others as it should? One hint that you're distracted, getting fatigued, or dropping behind when you probably shouldn't be, is that your cockpit isn't sealed & is noisy!
V-Seal
V-Seal is the cheapest, best, easiest & quickest modification you can make to a glider, to bring even more enjoyment to your day. After you try this handy little trick, you'll wonder how you ever flew without it. Be warned though, once you've flown with a quiet cockpit, you'll forever be agitated by everyone else’s noisy gliders - seriously!
What Do You Need?
V-Seal of course! After that just some TESA PVC Safety tape or similar, scissors & a cleaning agent. So, where do we start? The easiest way is to check out the video I put together for you, otherwise continue reading below for how to get a quieter cockpit in three easy steps.
Three Steps to a Quieter Cockpit
Step One is to prepare for installation. Start by cleaning the canopy frame to allow the double-sided tape to stick properly. Naturally, then you'll need to measure the amount of V-Seal you want to apply, generally, from just above the leading edge line, side to side is about right. You'll then need to cut off the small 2mm 'lip' on the v-seal that's on the non-sticky side, this will ensure you get the most flush & best end result.
Step Two, peel back about an inch of backing tape & stick to the canopy frame. But where? Put the double-sided tape on the canopy frame where you measured from, with the slit or cut within the v-seal that you'll be able to see, right over the canopy frame break that joins the fuselage. This will give a good anchor point to start off with. Typically this part is the easiest, as the canopy line is straight for the time being!
Next, pull back approximately 30cm of backing tape, this time to give you a long working line to help with the dynamic curve to follow. Then with the help of light, pull with plenty of tension on the seal, hold at a low angle to the canopy line, look for the light to help you place the cut line right down the join from the canopy frame that joins to the fuselage. Always pulling tension, this is the trick to ensure there are no ripples in the tape. If you don't get it to seat quite right, it’s ok to pull the tape back up a little & re-seat it perfectly.
Continue this around the whole backside of the canopy until it meets the equal point where you started from on the other side. Then ‘round’ the edges of the ends with scissors to make it look neat & tidy.
Step Three, follow-up by applying some TESA Safety Tape to help improve the airflow & to ensure it stays stuck!
I recommend just doing the rear of the canopy first, test flying to note the difference in cockpit quietness. If it's still a little noisy or breezy, then apply this process to the front of your canopy too!
Banner photo by Bozena Michalowski
 Adam Woolley was born into the gliding world, being the 3rd generation in his family. Going solo at 15, his thirst for efficiency in soaring flight & quest for a world championship title to his name has never wavered. One big passion is sharing his experiences & joy with other glider pilots all around the world. Adam is an airline pilot in Japan on the B767 & spends his off time chasing summer around the globe. He has now won 7 national Championships & represented Australia at 5 WGC's & 1 EGC.