Annuals and Condition Inspection
We have begun to reach the colder part of the year and the soaring season has slowed to a halt for many of us. For mechanics like me, this is our busy time of the year. It is a good idea to schedule your yearly maintenance for the late fall/early winter months and months ahead of time. You have the least chance of missing a good soaring day and worst-case scenario, if an issue is found there is more time to arrange repairs.
Annual or Condition Inspection?
It is important to know the difference between an annual and a condition inspection. These inspections are good for 12 calendar months, expiring at the end of the month dated in the logbook the year before.
Annual Inspections are required by type certificated gliders and need to be certified by a mechanic that holds an Inspection Authorization (IA) rating to be in airworthy condition.
Condition Inspections are yearly inspections required by experimental gliders, they need to be certified by a rated Airframe and Powerplant (A&P) mechanic to be in safe operating condition. It is possible to get pure gliders (non-motored) inspected by a mechanic that holds only their Airframe (A) rating.
Pre-Inspection Inspection
Before you bring your glider to your mechanic review and gather your paperwork.
- Total Airframe Time: and number of flights: Make sure your logbook is up to date
- Airworthiness Directives and Technical Notes: Perform and AD search to ensure your glider is up to date. You can perform an AD search by going to the FAA's website hover over Regulations and click Airworthiness Directives. Here you can search AD's by manufacturer. Although ADs are not applicable to experimental gliders, it is a good idea to comply with any technical notes that help keep your glider in the safest condition. It saves your mechanic time by providing an AD summary with your paperwork. Advisory Circular (AC 39-7D) set FAA policy that ADs are not applicable on non-type certificated aircraft, except when specifically noted.
- Weight & Balance: Review your weight and balance as well as your equipment list, make certain the data is current and reliable. Your weight and balance needs to be recalculated any time there is a major repair, alteration or installation of new equipment. Some manufacturers require periodic measurement of weight and balance stated in their operating manuals.
What goes into your inspection?
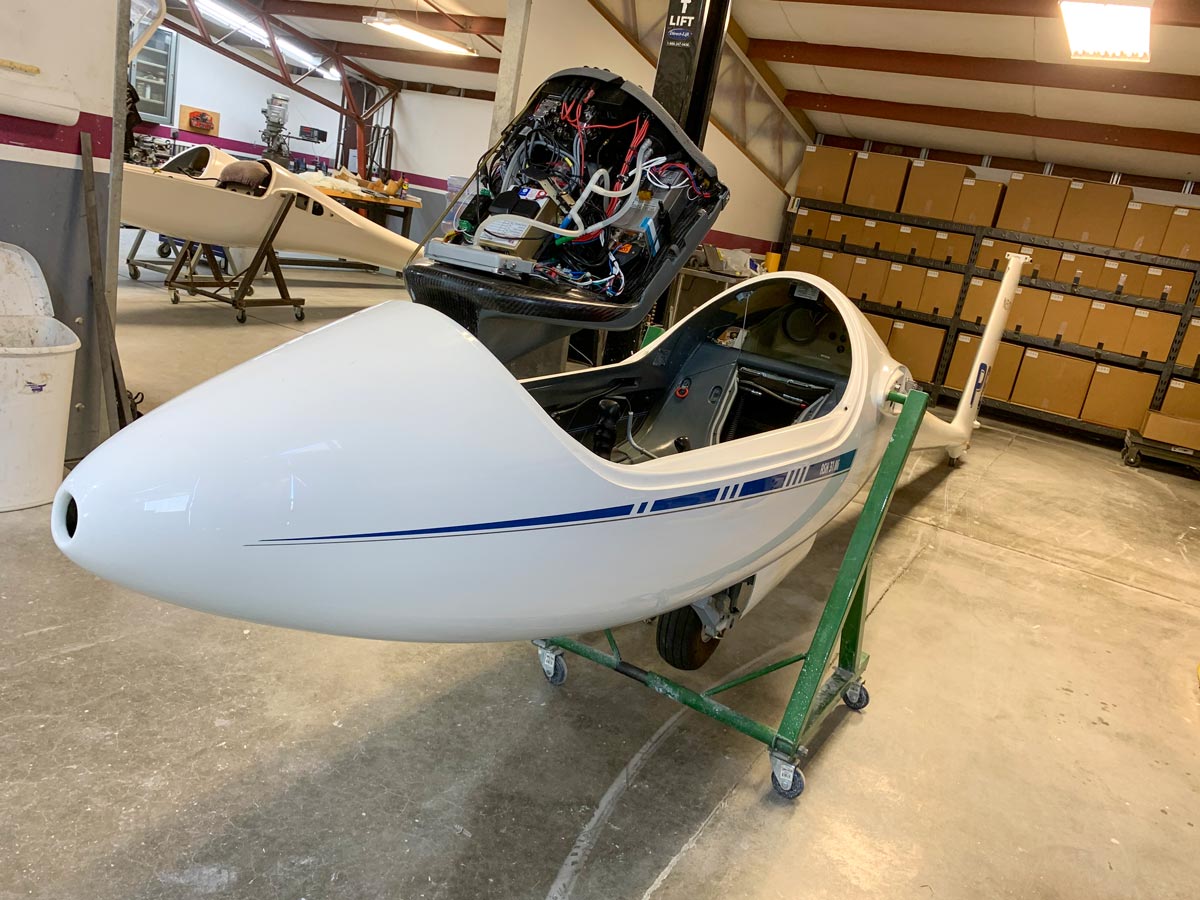
Specific tasks and inspection points vary from model to model, but the goal remains the same. Ensure the glider is in a safe condition for operation and airworthy when applicable. A checklist, provided by the manufacturer or one created or adopted by your mechanic that satisfies 14 CFR Part 43 Appendix D, is to be used during the inspection.Your mechanic should start by removing the seat pans and access panels, taking note of the way it was assembled. The aircraft should then be thoroughly cleaned and inspected. I often clean and inspect together, taking note of any possible issues. Remove any forgein objects (dust/dirt, loose items, excess grease, etc.) Life limited parts should be inspected and found to be within limits or otherwise replaced. Review lubrication diagrams and instructions when available. Lubricate accessible bearings, bushings and other metal on metal moving parts. Actuate all controls checking for free and secure movement. Check all hardware for tightness visually and as advised by the manufacturer. Check for proper operation of all installed equipment such as avionics and oxygen. Placards, Airworthiness Directives (when applicable), minimum instrumentation and airspeed limit marking are to be checked for compliance. Assemble the glider for a final inspection.
Inspections are finalized with a logbook entry. Make sure your logbook gets the correct endorsement. Annual inspections must be signed off to be airworthy, whereas condition inspections are to be signed off to be in safe condition for operation. The logbook endorsement must include the total time on airframe, date, make and model of the glider, what was done, a statement certifying completion of the inspection, and the mechanics certificate number with their signature.
Helpful Tips
- Organize all your paperwork and keep it together.
- Remove all personal items from the cockpit that are not part of the glider and are necessary for operation.
- Remove wingstands and other miscellaneous items that get in the way of pulling your glider in and out of the shop.
- Discuss your glider unloading/reloading procedure. (especially for custom trailers)
- Clean up any accessible foreign bodies in the cockpit and on the exterior. Any time you save us saves you money.
- Schedule ahead of time. Review your logbook and figure out when your annual expires. The further in advance you can schedule your annual the more likely you are able to get it done when you want it.
Banner photo by Danny Schaefer
 Danny Schaefer is the owner and operator of Schaefer Aviation. Schaefer Aviation specializes in glider repair, refinish, and inspection. He is a licensed glider pilot, has over 12 years of experience in the field, has refinished more than 20 gliders, repaired and inspected many more. His shop is located at the Williams Soaring Center Airport in California. He prides himself on his attention to detail and ability to complete complicated composite repairs. To find out more information about Schaefer Aviation, check out www.schaeferaviation.com.

