TOST Drum Brake Adjustment
Tools Required: two crescent wrenches: 8mm and 10mm, flashlight or trouble light, 13mm wrench.
Every time that the TOST wheel or brake is serviced, this procedure must be followed to ensure that the brake is effective.
The challenge is that the brake is not inherently very effective – for in most gliders, under most circumstances, gentle braking is required to keep from scratching the underside of the cockpit on the tarmac. An adverse outcome of a poorly tensioned brake cable is that the brake shoes become glazed. This requires that the brake pads be freshened with emery paper (of about 250 grit or somewhat higher) to remove the glazing.
1. Adjusting the brake cable tension.
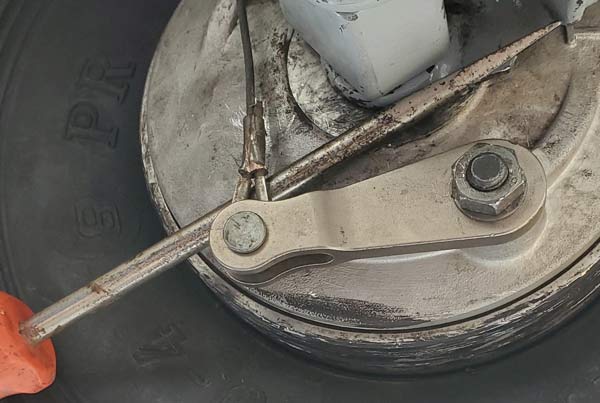
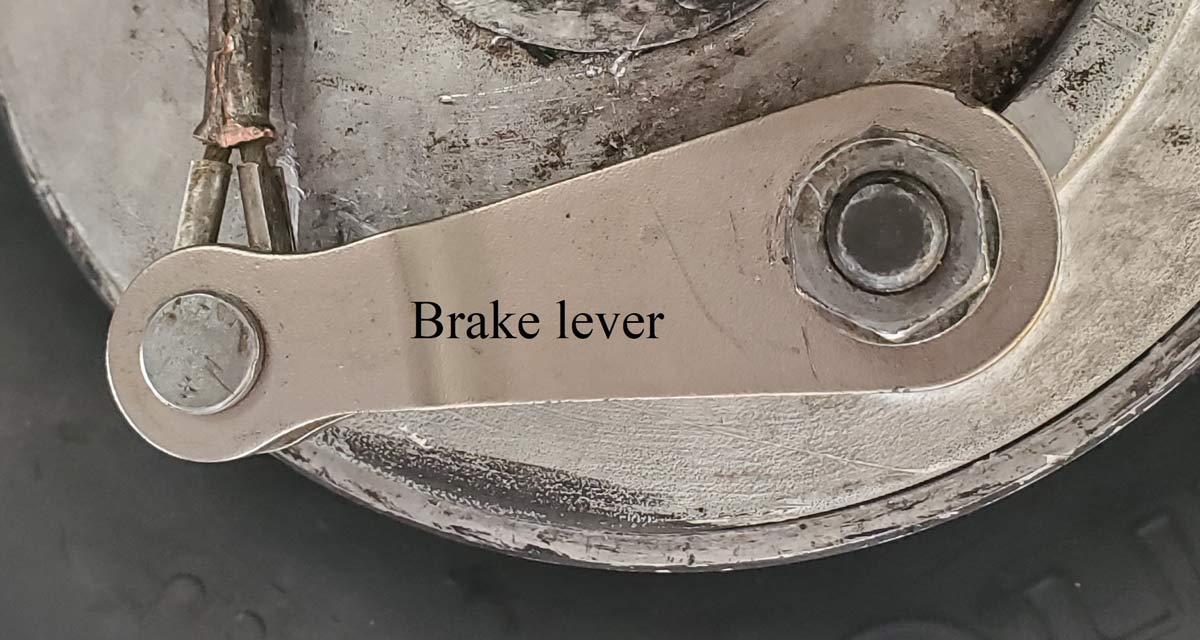
The brake lever is operated by the cable, which ends at the control stick. The lever’s fulcrum is toothed and fits over a fluted bolt that rotates to press the shoes against the drum. It is impossible to get adequate tension on the cable without adjusting both ends of the cable mechanism, at the control stick and the wheel.
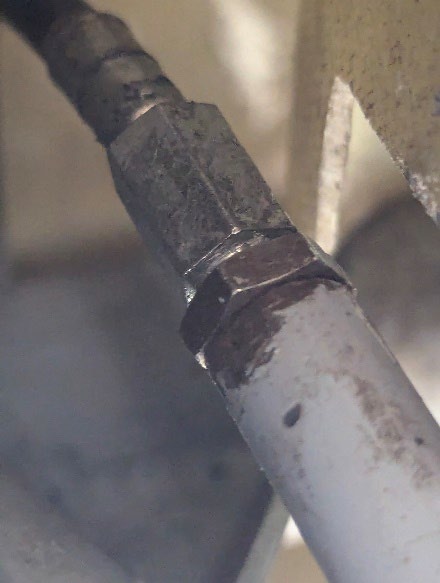
The adjustment mechanism
The image at the right shows the end of the cable at the control stick. This is a bicycle cable adjustment mechanism, familiar to most cyclists (who have worked on their own bikes).
Loosening the brake cable
In order to properly adjust the brake tension any time that the lever arm must be removed one must first fully loosen the adjustment mechanism.
Loosen the cable by releasing the lock nut, then wrenching the turnbuckle up against the stop. (To back this out tightens the cable. You will back these out after reassembling the brake and brake lever.)
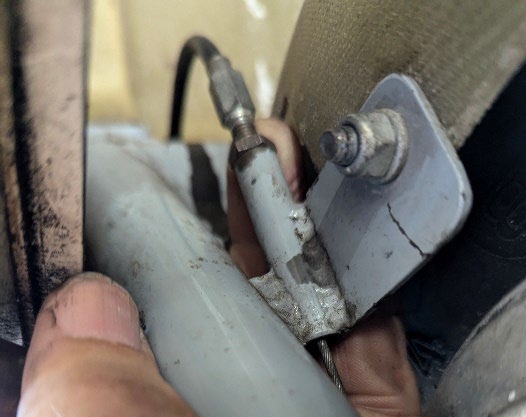
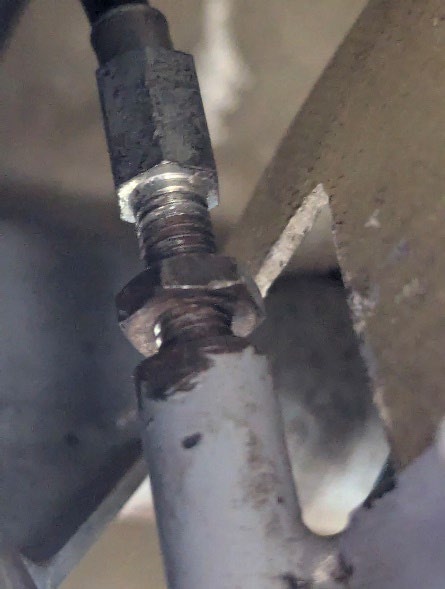
There are two, one at each end of the cable. The top one is circled here. The lock nut is 10mm, and the turnbuckle is 8mm. The one at the lower end of the cable is located deep in the wheel well on the port side, likely disguised by grime. It's easiest to find whilst flat on your back, with the port gear door taped up and away.
Use a light! Fully loosen this! Proper brake adjustment depends on having the cable loose when the lever arm is reattached to the brake drum. This is very fiddly – you will be able to turn this hex nut 1/6 turn at a time.
Here’s the lower end. In both photos, the cable is tight.

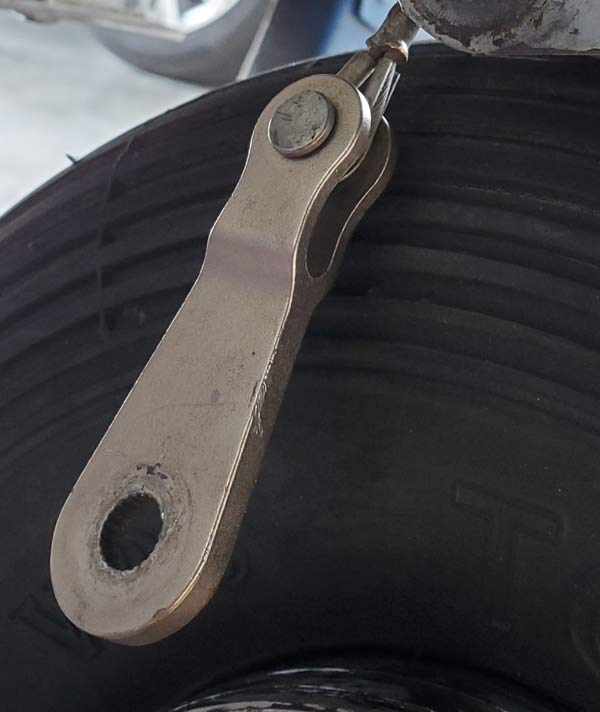
2. Assembling the brake lever at the wheel.
It is impossible to remove the wheel (typically to change the tire) without removing the brake lever.
This means that the brake tension must be adjusted every time the wheel is removed. Of course, the wheel must be removed to inspect, dress, or replace the brake shoes.
At right, the brake lever arm is dangling after removal. Don’t bother to remove the brake cable, because replacing that is more work that you care to imagine when the core task is merely changing the tire.
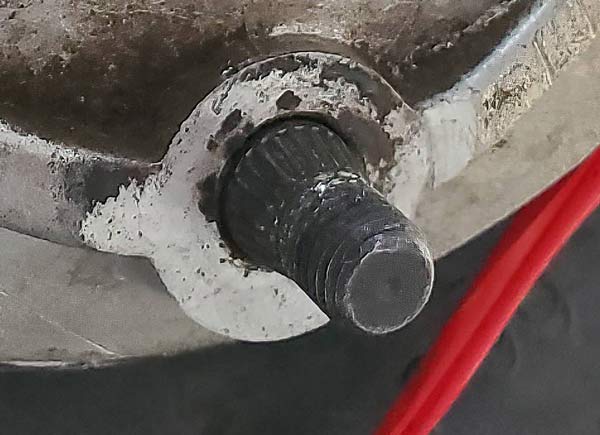
Here is the fluted bolt over which the lever arm is placed after the wheel is back in place. It is not possible to adjust this bolt. If this bolt resists turning at all, lubricate it by spreading the brake shoes slightly and lightly greasing the bolt and shoe faces with synthetic grease that will not cake. And tap the fluted bolt slightly to move it into the wheel a little and lubricate its shaft. After this, when assembled, the lever arm should turn easily by hand.
Reattach the brake lever arm Now re-attach the brake lever arm. Holding mild tension of the cable while you slip the lever arm over its fluted bolt will ensure that you can easily tension the brake cable later.
Tightening the brake cable. In the wheel well, release the lock nut, then back the fitting out about a cm. (If you back it completely out, good luck re-threading it!). The wheel should still turn freely, but there should be a little resistance at the brake lever on the control stick. Tighten the lock nut.
Now, turn to the cockpit end of the cable and finish tightening it.
Back the turnbuckle out until the brake shoes hinder the wheel from turning, then turn it back in until the wheel just begins to turn freely. Now tighten the lock nut. This is where you will adjust the cable as it loosens in the future.
At this point, it should be possible to squeeze the brake lever in the cockpit and have adequate braking action without squeezing the handle against the stick. Readjust this any time
The cable is maximally loose
The cable is tight, and the lock nut is not yet secured
3. Pretensioning the lever arm.
Even though the cable housing has been adjusted to its greatest looseness, life will be easiest if the brake lever arm is tightened against the cable while sliding it over the flutes and replacing the nut that holds the arm on. Firm pressure with a long screwdriver as a lever is enough. An assistant can do this while you fiddle with getting the lever arm seated on the fluted bolt.
4. Tighten the brake cable at both ends, lower first.
After tightening the nut, tighten the lower cable end, then the upper one, as described on the first page.
I am grateful to Andrew Maddocks for pointing me to the wheel well end of the brake cable, which had been invisible to me, causing my adjustment to be inadequate.
Reprinted by permission, Copyright © 2022, DrDan Johnson