TOST 4" Shoe Brake Wheel


TOST 4" Shoe Brake Wheel

General Description
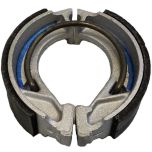
TOST 4" Shoe Brake Wheel Liliput - The shoe brake (BB) wheel Liliput features a big torque flap for ideal torque transfer.
TOST 4" Shoe Brake Wheel Kobold - Small installation dimensions with the brake power of a 5″ wheel, this is our 4″ shoe brake (BB) wheel Kobold.
TOST 4" Shoe Brake Wheel Gnom -The 4″ wheel Gnom with the big brake (BB) assembly is ideally suited for motor gliders with central wheel, for vintage gliders or high demands in terms of load capacity with small wheel hub diameter.
TOST 4″ Shoe Brake Wheel price varies depending on selection. Use dropdown box above for selection and final price.

4′′ Shoe brake wheel Liliput
|
P/N SKU |
Desc |
Install Width mm |
Bearing ∅ mm |
Tire Size |
Weight g W/O Tire |
Brake Torque Nm Max |
Tyep of Hubq |
|
044200 5920 |
4′′ BB Liliput | 88 | 17 | 2.80/2.50-4 260×85 4.00-4 |
1340 | 130 | Two Part |
4′′ Shoe brake wheel Kobold
|
P/N SKU |
Desc |
Install Width mm |
Bearing ∅ mm |
Tire Size |
Weith g W/O Tire |
Brake Torque Nm Max |
Type of Hub |
|
044300 5925A |
4′′ BB Kobold 103-20 |
103 | 20 | 4.00-4 5.00-4 |
1760 | 200 | Two Part |
|
044325 5925B |
4′′ BB Kobold 103-25 |
103 | 25 | 4.00-4 5.00-4 |
1740 | 200 | Two Part |
|
044400 5925C |
4′′ BB Kobold 113-20 |
113 | 20 | 4.00-4 5.00-4 |
1830 | 200 | Two Part |
|
044500 5925D |
4′′ BB Kobold 113-25 |
113 | 25 | 4.00-4 5.00-4 |
1810 | 200 | Two Part |
4′′ Shoe brake wheel Gnom
|
P/N SKU |
Desc |
Install Width mm |
Bearing ∅ mm |
Tire Size |
Weight g W/O Tire |
Brake Torque Nm Max |
Type of Hub |
|
044700 5926A |
4′′ BB Gnom 187-30 |
187 | 30 | 355x150 | 3200 | 280 | Three Part |
|
044800 5926B |
4′′ BB Gnom 213-30 |
213 | 30 | 8.00-4 | 3610 | 280 | Three Part |
Notes to aircraft tires
Tire exchange
Removal:
- Jack up aircraft at specified point.
- Deflate tire completely before removing wheel unit.
- Do not unscrew the valve insert until the tire pressure has dropped to 0.2 bar.
- Remove wheel from axle.
- Loosen wheel bead from the hub shoulder with a rubber or plastic hammer.
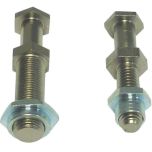
- Undo wheel bolts (with 5 mm hexagon key), remove bolts and washers, split hub halves.
Mounting:
- Tires and wheel hubs must be clean and dry.
- Do not apply excessive force when replacing a wheel.
- Apply adhesive agent (or talcum powder) to the hub shoulder.
- Remove dirt, sand, labels, etc. from the tire. Apply a moderate amount of talcum powder to reduce friction between tube and tire.
Caution: Too much talcum has the opposite effect. - Fill air into tube (placed in the tire) until it is evenly round. Remove nut and washer from valve.
- Place tire (red mark at valve hole) and tube on the wheel half with the valve hole, push valve through valve hole
- Push other wheel half onto tire, match bolt holes with centering shaft.
- Insert wheel bolts, washers and any nuts, and tighten to the correct torque (M6: 9 to 10 Nm). Tighten bolts diagonally.
- Place a tire in a safety cage when inflating it to mounting pressure for the first time. If you do not have a safety cage, take great care when inflating the tire. Inflate the tire to mounting pressure. The mounting pressure is 10% more than the specified operating pressure. Check carefully for leaks. Leave to adjust at this pressure for 12 to 24 hours. Once the tire shows no leaks and is at operating pressure, the wheel unit can be mounted on the aircraft.
- Make sure that the wheel unit is mounted perfectly balanced to avoid vibration and excessive wear.
Red Dot:
Larger aircraft tires are marked with a red dot. This is an indication of the lightest spot of the tire. The valve must be placed at this point to eliminate or minimize a balance/vibration problem of the tire.
WARNING:
An inflated tire is a potentially explosive device – treat it with the correct equipment and precautions!
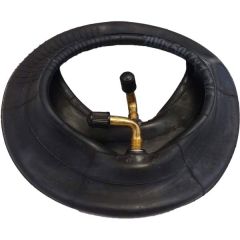
Notes on inner tubes
Aircraft tubes are made from natural rubber, and they are slightly underdimensioned so that it is easier to install them in a new tire. The layers of an aircraft tire are made of nylon – they therefore tend to become larger with use.
The inner tube also increases in size, adapting to the larger inside diameter of the tire. If a tube enlarged in this way is later fitted in a new tire, it can happen that it is too big for the inside of the tire, with the result that the tube may crease.
These creases may rub through during operation, causing the tube to lose pressure. Rubbing through slowly results in slow pressure loss – the pilot is thus warned before a dangerous situation arises. If the tube tears during a start, the pilot will fail
to notice that he is flying with a flat tire.
Taking into consideration all the risks involved with fitting an old tube into a new tire, it is advisable always to fit new inner tubes in new tires.
Tire maintenance instructions
- Maintain stipulated air pressure, check at regular intervals! Underpressure results in reduced load capacity and shortens service life.
- Inspect tires at regular intervals for damages, shredding, flat areas and foreign objects.
- Wheel units must be mounted perfectly balanced. Wheel imbalance can result in damage to bearings and brake drums.
- Keep tires free of oil, grease, brake fluid and tar. Clean tires with rag soaked with petrol, then wash off with soap and water.
W&W typically stocks the 4" Shoe Brake Wheels highlighted in yellow in the "Tech Data" table. Other P/N's please allow approximately 4 weeks for delivery.
TOST 4" Shoe Brake Wheel is sold as pictured. Tire and Tube sold separately.
Always use TOST Tires and Tubes when available.
See "Tech Data" tab for Description and Technical Data.
See "Docs" tab for "TOST Tire, Tube & Wheel Selection Guide".